
![]() Note: additional information on the subject contained here can be obtained from an instructional video clip
Note: additional information on the subject contained here can be obtained from an instructional video clip ![]() at the form.suite4.net web site.
at the form.suite4.net web site.
The Toolbox provides access to user interface controls and other components. The elements are arranged in groups, the most of common of which are "Windows Forms", "Data Tools" and — providing the form is connected to a business class — "Business Class". These groups are explained below.
You can customize the Toolbox by right-clicking on it and selecting any of the commands from the context menu. Customization options include modifying the sequence of elements in the Toolbox, moving elements between groups and adding custom elements from external DLLs.
Drag an element from the Toolbox to the form to position it precisely or double-click on it to add it without regard to its position.
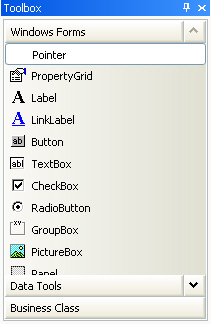 This section of the toolbox contains the set of built-in .NET Windows Forms controls. Further information about these controls is available in the MSDN documentation of the System.Windows.Forms namespace.
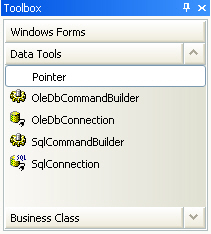 This group contains non-visual components for use with ADO.NET data access. Information on them is available in the System.Data and related namespaces in the .NET Framework documentation.
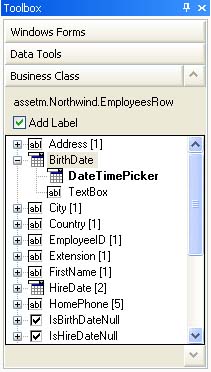 form.suite4.net provides you with the necessary infrastructure to connect a form to a business class. Once assignment of a class to a form has been accomplished, the Toolbox contains an additional group named "Business Class".
The group lists all public properties of the class. Each property is bound to a control that is most suitable to display the property's data type. String properties are bound to TextBox controls, DateTime properties to DateTimePicker controls and so on. Where a class property can be displayed in more than one control, this control is also provided as can be seen in the example to the left. One of the controls is the default, the other or others are alternatives that can be used as well.
Double-click on the control or drag it onto the form to add a bound input element to the form. If you prefer not to have a Label added at the same time, deselect the "Add Label" checkbox.
The numbers in square brackets [] next to each property indicate the total amount of bound controls that have been added to the form for this property.
Note: The assignment of data types to controls can be customized through the program options.